A lot of people think self‑watering gardens require fancy store‑bought planters or pricey irrigation kits. In reality, the core technology is incredibly simple: a water reservoir under your soil, plus a way for water to wick upward as plants need it. And that’s exactly what most of us are already throwing away—bottles, buckets, old tubs, IBC (intermediate bulk containers) totes, crates, and fabric scraps can all be turned into highly efficient, drought‑resilient growing systems.
Garden educators call these setups sub‑irrigated planters (SIPs) or wicking beds. They work by storing water in a cavity below the soil and letting it move up through capillary action instead of pouring it from the top. This keeps moisture much more stable, reduces evaporation, and can cut water use by 60–80% compared to top watering. The best part: you can build them almost entirely from recycled trash, from soda bottles for herbs to cut‑down IBC totes for full‑size beds.
Below is a deep, practical walkthrough of how these systems work and how to build them at different scales using materials you probably already have or can salvage.
The Science Behind Self‑Watering Containers
All self‑watering gardens share three basic elements:
- A sealed container or lower chamber that holds water (the reservoir).
- A wicking path – usually soil, fabric, or another porous medium that connects the water to the soil above.
- An overflow + fill system – a way to add water and a hole at a fixed height so you don’t flood the soil.
When you pour water into the fill tube, it collects in the bottom reservoir. As the top soil dries, water is pulled upward through the wick or saturated zone by capillary action (the same physics that lets a paper towel soak up a spill). Plants then draw water from this evenly moist band instead of dealing with the feast‑and‑famine pattern of overhead watering.
University extension guides and DIY tests show that SIPs and wicking beds:
- Keep soil consistently moist, which supports deep, healthy root systems.
- Reduce water loss from surface evaporation and runoff, often saving 80% compared to top‑watering buckets.
- Re‑capture nutrients that leach downward—roots can sip them back up from the reservoir instead of losing them out the bottom.
That makes them perfect for hot balconies, forgetful waterers, and low‑rainfall climates.
Turning Trash Into Self‑Watering Pots
Let’s start with tiny systems—great for herbs, leafy greens, and windowsills.
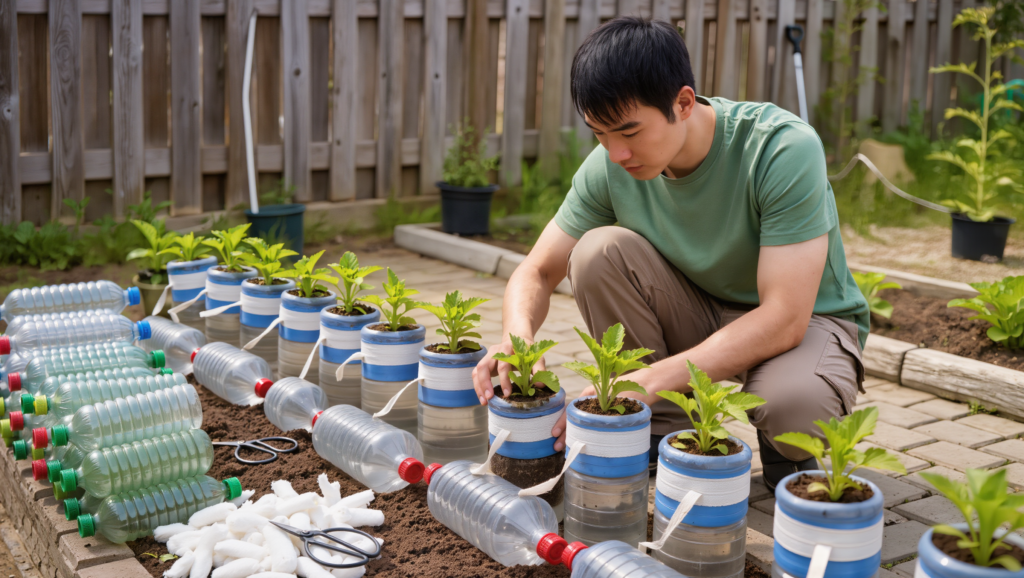
Option 1: Two‑liter soda bottle planter
Garden blogs and container‑gardening educators have popularised a simple design using a single PET bottle:
You’ll need:
- 1 clean plastic soda bottle (1–2 L).
- A strip of felt, cotton, or other absorbent fabric (the wick).
- Scissors/knife, a nail or screwdriver for holes.
- Potting mix and a small plant or seeds.
How to build it:
- Cut the bottle in half.
- The top half becomes the planting cup, the bottom half is the water reservoir.
- Add a wick.
- Push a strip of felt or thick cotton through the bottle neck so part of it hangs into the reservoir and part sits in the soil section.
- This is your water highway.
- Prepare the planting cup.
- Poke a few extra small holes near the neck for drainage/air.
- Fill with a light potting mix (not heavy garden soil).
- Assemble.
- Invert the top half with soil into the bottom half containing water.
- Ensure the wick reaches the water.
- Plant and maintain.
- Plant herbs or small greens.
- Refill the bottom with water when it gets low.
DIY guides show that this basic design works reliably for indoor plants and seedlings, and costs essentially nothing beyond some soil and a few minutes of cutting.
Option 2: “Trash‑stack” micro planters (yogurt cups, takeaway tubs)
You can do the same trick with any two nested containers: yogurt pots, old food tubs, even coffee cups.
Basic idea:
- The inner cup gets a hole with a fabric wick and holds the soil.
- The outer cup holds water.
- The wick runs through the hole, touching water below and soil above.
These are perfect for:
- Microgreens and cut‑and‑come‑again herbs.
- Starting seedlings that you don’t want to dry out.
Medium Scale: Bucket and Crate Sub‑Irrigated Planters
For tomatoes, peppers, bush beans, and bigger salads, move up to buckets or tubs. You can do this with damaged buckets, paint pails, storage totes, or even old recycling bins.
Classic “two‑bucket SIP” (from recycled buckets)
Extension services and DIYers have refined a simple design using two 5‑gallon (≈20 L) buckets:
Materials (recycled if possible):
- 2 food‑safe buckets (e.g., restaurant frosting buckets).
- 1 smaller plastic pot or cut‑down bottle to act as a wicking column.
- A short length of pipe or sturdy tube (for a fill pipe – a piece of hose, PVC offcut, or similar).
- Drill / hot nail for holes, light potting mix.
How it works:
- The bottom bucket holds water.
- The top bucket has a section cut out or extra holes and sits inside the lower one, creating a reservoir underneath.
- The wicking column (small pot or bottle filled with soil) pokes down into the water space.
- A fill tube lets you pour water into the reservoir, and an overflow hole in the outer bucket keeps you from overfilling.
University of Florida’s DIY SIP guide outlines a similar structure and emphasises drilling an overflow hole just below the inner bucket’s base to prevent waterlogging.
If you don’t have two matching buckets, you can improvise:
- Use an old crate or broken storage bin as the inner platform.
- Use a cut‑down bottle or yogurt pot as the wick.
A popular single‑bucket SIP design shows you can even create a large reservoir and wicking area with just one bucket and a recycled bottle as a central wick, cutting water use by up to 80% compared to top watering.
Large Scale: Wicking Beds from IBC Totes and Scrap
If you want to grow serious amounts of food, wicking beds built from salvaged IBC totes (intermediate bulk containers) or big pallets/tubs are a game‑changer.
An IBC tote is a large plastic tank inside a metal cage, often used to store liquids for transport. They’re widely available second‑hand and can be repurposed into raised, self‑watering beds holding hundreds of litres of soil.
Basic IBC wicking bed concept
Guides from homesteaders and garden suppliers all follow a similar structure:
- Cut and clean the tote.
- Cut the IBC horizontally to turn the bottom half into a bed.
- Thoroughly clean it—especially if it held anything other than food‑grade contents.
- Create a reservoir layer.
- The bottom part of the bed is filled with a non‑decomposing material like coarse gravel, scoria, or sand.
- A perforated drain pipe or “agg pipe” can be laid through this layer to spread water evenly.
- Add a separation layer.
- Cover the reservoir with geotextile fabric, shade cloth, or even old shade cloth and burlap to keep soil from falling into the water zone while still allowing wicking.
- Fill with soil mix.
- Above the fabric, fill with a rich but well‑draining growing medium. Some gardeners use a layered approach, adding leaves, wood chips, biochar, and compost for water retention and fertility, then topping with good soil.
- Install fill and overflow.
- Add a vertical fill pipe (e.g., old PVC, conduit, or sturdy hose) down into the reservoir.
- Drill an overflow hole through the side of the bed at the height of the top of the reservoir layer so excess water can escape.
Once filled, you water via the pipe until water seeps out of the overflow. The lower layer stays saturated, and moisture wicks up into the root zone. This system has been widely adopted in dry climates because it drastically cuts evaporation and over‑watering dramas.
Even if you don’t have an IBC, the same layering—lined pallet box or recycled bathtub → gravel/sand reservoir → fabric → soil—gives you a wicking bed built largely from reclaimed materials.
Why Self‑watering Designs Works So Well for Recycled “Trash”
Self‑watering designs are forgiving and modular, which makes them ideal for scavenged or mismatched materials:
- Any watertight container can be a reservoir – broken coolers, damaged storage tubs, old sinks, barrels, bathtubs.
- Old bottles, cups, and pots are perfect for wicks and inner support structures.
- Fabric scraps (old cotton T‑shirts, felt, worn‑out towels) make excellent wicks in small systems.
- Crates, bread trays, or scrap plastic can act as platforms or internal supports to keep soil above the water in larger beds.
DIY guides stress that the main things to watch are:
- Containers should be food‑safe or thoroughly cleaned if they held anything chemical.
- Materials in constant contact with wet soil should not leach toxic substances.
- Anything structural in the reservoir (e.g., wood blocks) should ideally not rot quickly.
Beyond that, it’s a creative puzzle: you’re just arranging found objects into those same three functions—reservoir, wick, overflow.
Soil, Plants, and Practical Tips
Soil: airy, not heavy
Because SIPs and wicking beds keep the bottom zone constantly moist, you want a light, well‑aerated mix:
- Use bagged potting mix or a DIY blend of compost + coco coir/peat + coarse material (perlite, pumice).
- Avoid filling with pure garden soil, which compacts and can turn to muck in a constantly damp lower layer.
Instructables SIP builds and extension guides specifically recommend a lightweight potting mix and advise “priming” the wick area by thoroughly soaking the lower part of the soil the first time you fill the reservoir.
What grows best?
Most crops that like consistent moisture thrive:
- Leafy greens: lettuce, spinach, kale, chard.
- Herbs: basil, parsley, mint (contain mint, it spreads).
- Fruit crops: tomatoes, peppers, eggplants, cucumbers (especially in larger tubs or wicking beds).
- Root crops: carrots, beets, radishes (provided soil is deep and loose).
Very dry‑loving Mediterranean herbs (rosemary, thyme, lavender) can struggle in constantly moist systems; for them, use a smaller reservoir or a regular pot.
Fertiliser and salts
Because drainage is limited, salts from synthetic fertilisers can build up more easily:
- Prefer organic amendments (compost, worm castings, slow‑release organic fertilisers).
- If you must use soluble ferts, use modest doses and occasionally flush from the top until some water drains from the overflow to clear accumulated salts.
Studies and DIY experience note that one advantage of SIPs is that nutrients that leach downward end up in the reservoir and can be wicked back up, meaning you often need less fertiliser overall—so err conservative.
Maintenance
- Check the reservoir periodically and refill through the tube when low.
- Clear overflow holes if they clog.
- In colder climates, consider draining large reservoirs before hard freezes to avoid cracking.
Putting It All Together: Example Build Using Pure “Trash”
Imagine you have:
- A cracked 60 L storage tote.
- Two old bread crates.
- Several 2 L bottles.
- Scraps of shade cloth or old cotton.
- A short length of scrap pipe or hose.
You can build a multi‑plant self‑watering box like this:
- Patch any large cracks in the tote with silicone or tape where it doesn’t need to be pretty.
- Lay the bread crates in the bottom as a support grid—this creates a hollow reservoir under them.
- Drill an overflow hole in the side of the tote just below the top of the crates.
- Cut the bottoms off the soda bottles, punch some holes in the sides, and stand them upright between crate bars—these become vertical wicking “chimneys.” Fill them with potting mix.
- Lay shade cloth or old fabric over the crates and bottles so soil can’t fall through but can still wick water from
- Add a fill pipe (old hose or pipe) down one corner of the tote into the reservoir space.
- Fill above the fabric with potting mix, tamping it firmly into the bottle‑chimneys to ensure good contact.
- Plant your crops. Fill the reservoir through the pipe until water seeps from the overflow. Prime the soil by watering from the top once.
You’ve just turned a pile of “waste” into a high‑efficiency, drought‑resilient bed that can sit on concrete, balconies, or poor soil, producing herbs, greens, or even tomatoes with minimal watering.
Self‑watering gardens are one of those rare DIY projects where the science, sustainability, and convenience all line up: you’re using physics (capillary action), capturing water that would normally evaporate, and giving “trash” a second life as infrastructure for food. Once you’ve built one and see how evenly your plants grow—and how little you drag hoses around—you’ll start looking at every empty container as a potential reservoir in disguise.