If you care enough to grow organic veg, it makes total sense to care about what’s in the water you’re using. Harvesting rainwater can be a brilliant, low‑impact way to irrigate your beds—but you do need to set things up safely so you’re not accidentally spraying roof chemicals or bacteria onto your salad.
Below is a practical guide to building a safe rainwater system for your organic vegetable patch, step by step—from roof to roots.
Why Rainwater Is Great for Organic Veg
Rainwater is naturally soft, low in dissolved salts, and free from chlorine and other disinfectants that come with municipal tap water. That makes it gentle on soil life and ideal for organic gardens, where you’re trying to protect beneficial microbes and worms.
Some key advantages:
- It avoids chlorine and (in many areas) fluoride, which can stress sensitive plants and soil biology.
- It’s slightly acidic, which often suits vegetables better than alkaline tap water.
- Using rainwater reduces mains water use, easing pressure on local supplies and your water bill—some garden‑scale systems can cut tap use by up to 50%.
- When used with drip or soaker hoses, rainwater can boost yields and water efficiency dramatically; drip systems can cut water use by up to about 70%.
The flip side: as soon as rain hits a roof or dirty gutter, it can pick up debris, bird droppings, and chemicals. That’s where design and hygiene matter.
Step 1: Check Your Roof Is Food‑Safe Enough
The first safety question is simple: What is the rain landing on?
Guides for veggie gardens strongly recommend using inert, non‑toxic roofing materials if you’re collecting water for food crops.
Better choices:
- Metal roofs (galvanised or coated steel, zinc, etc.)
- Clay or concrete tile
- Untreated slate or similar inert materials
Materials to avoid for edible beds:
- Old asphalt / bitumen shingles that can leach hydrocarbons.
- Roofing or paints treated with fungicides, biocides, or lead‑based coatings.
- Treated timber shingles that may leach copper, arsenic, or other preservatives.
If your house roof is questionable, you still have options:
- Use a separate shed or greenhouse roof with a safer material.
- Use water from a questionable roof for ornamental plants or paths, and keep a safer line (or mains water) for edibles.
Step 2: Build a Clean Collection Path (Gutters, Screens, First‑Flush)
Once the rain hits a suitable roof, the next goal is to get it into storage without half the local ecosystem attached.
Clean and maintain gutters
Even a simple system works better (and safer) if gutters are clear:
- Remove leaves, moss, bird nests, and debris several times a year.
- Install gutter guards or leaf screens to stop big debris before it enters your downpipe.
Clogged gutters not only contaminate water; they also become mosquito and pathogen hotspots.
Install a basic filter
Before water reaches your barrel or tank, run it through:
- A coarse debris screen at the downpipe diverter.
- A small inline filter or basket filter to catch fines.
Guides on clean rainwater for gardening emphasise filtering at entry, not just trusting a lid to keep things clean.
Use a first‑flush diverter (huge safety upgrade)
The first few litres of rain carry most of the dust, pollen, bird poop, and roof grit. A first‑flush diverter is a simple device that diverts that dirty first flow away from your tank.
Why it matters for food safety:
- It significantly reduces microbial and chemical contaminants entering storage.
- Extension guides for using harvested rainwater on edibles specifically highlight first‑flush diverters as a best practice.
You don’t need anything fancy: many DIY designs use a vertical pipe with a ball or valve that fills first, then closes, letting cleaner water flow to the barrel.
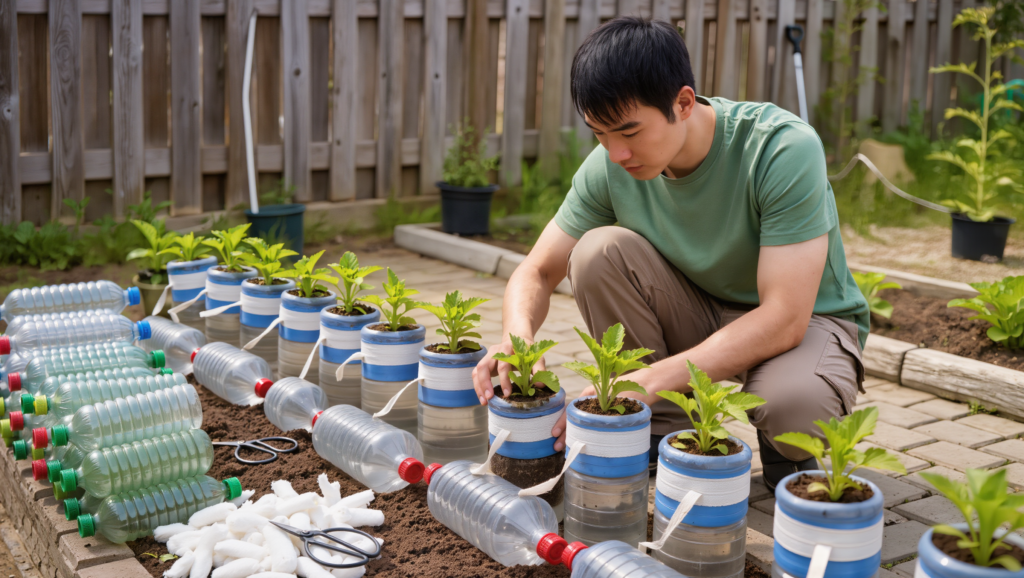
Step 3: Choose Safe Storage (Barrels, Cisterns, and What NOT to Use)
Not every big container is safe for watering organic veg.
What to look for in a tank or barrel
Rainwater guides recommend:
- Food‑grade plastic, stainless, galvanised, or concrete tanks or barrels
- Opaque or dark‑coloured material to block light and reduce algae growth
- A tight‑fitting lid to keep out insects, rodents, and debris
- A fine insect screen over any vents or inlets to stop mosquitoes
In practice, that often means:
- A 200–250 L (50–65 gallon) food‑grade barrel for small gardens.
- Larger above‑ground tanks or even buried cisterns for bigger beds; underground storage keeps water cool and reduces evaporation.
What to avoid
- Old chemical drums (pesticides, oils, solvents) – residues can linger and are not compatible with organic growing.
- Clear tanks exposed to sun – they become algae aquariums fast.
- Open tubs or buckets – high contamination and mosquito risk.
Guides for clean rainwater stress that “just any container” is only acceptable if it can be fully covered and is designed or repurposed from food‑safe use.
Step 4: Plumb for Pressure and Overflow (Without Flooding Your Beds)
Rain barrels are simple: water in at the top, tap at the bottom. But a few design tweaks make your life easier and safer.
Raise the barrel for better flow
Because barrels are gravity‑fed, placing them on a sturdy raised platform:
- Increases water pressure at the tap.
- Makes it easier to get a watering can under the spigot.
Many gardeners use concrete blocks or thick timber stands. Just make sure it’s stable: water is heavy (around 1 kg per litre).
Plan for overflows
A full barrel in a big storm has to send the excess somewhere:
- Fit an overflow outlet near the top of the barrel/tank.
- Pipe overflow to a safe area: a soakaway, a rain garden, or a swale, not directly onto building foundations.
Good overflow management protects your soil from erosion and avoids creating stagnant, muddy patches around your veg beds.
Step 5: Keep the Water Clean Over Time
Even nicely filtered rainwater is not sterile, and that’s okay—soil isn’t sterile either. But you want to keep microbial growth and contamination under control.
Key hygiene practices recommended for garden rainwater systems:
- Clean gutters and screens regularly (at least a couple of times a year, more if you have big trees).
- Inspect and rinse filters when they clog.
- Check barrels for sediment and algae; empty and scrub them periodically (e.g., annually or between main growing seasons).
- Ensure all access hatches and lids close properly and insect screens are intact, to prevent mosquitoes and debris.
Extension guidance for edibles stresses that harvesting practices + water quality together determine safety; maintenance is non‑negotiable if you’re watering crops you’ll eat raw.
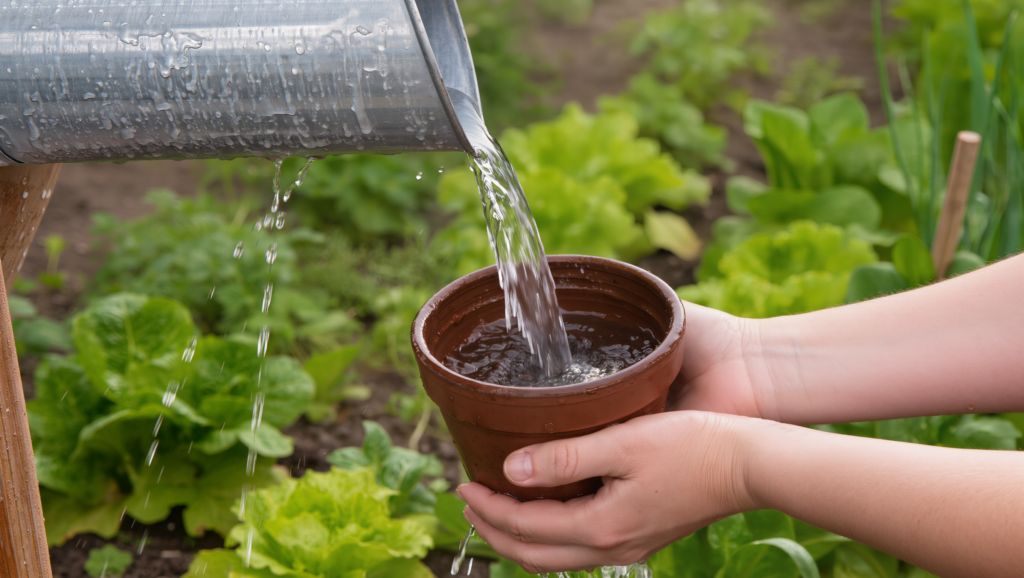
Step 6: Use Rainwater on Veg Safely (Especially Leafy Greens)
This is the bit many people miss: how and when you apply the water matters for food safety just as much as what’s in the barrel.
University guidance on using harvested rainwater for edibles recommends:
Prefer soil‑level watering, not overhead
- Use drip irrigation, soaker hoses, or watering cans aimed at the soil, not the leaves.
- This reduces the chance that any microbes in the water end up on the part you’ll eat.
Drip and soaker systems also slash evaporation losses and leaf wetness, which helps prevent fungal diseases and saves water.
Be extra cautious with raw, leafy crops
For salad greens, herbs, and any veg you eat raw:
- Ideally avoid overhead spraying with harvested rainwater.
- If water has to touch edible parts, allow a withholding period (several days) before harvest so sunlight and drying can reduce microbial load.
- Always wash harvests under clean water before eating.
Guides on edibles point out that root crops or fruiting crops (tomatoes, beans, squash) are generally lower risk than lettuces and herbs where the edible part is directly exposed.
Don’t drink it
Even well‑managed harvested rainwater is not usually treated as potable. The safest assumption:
- Use it for irrigation only, not for drinking.
- Keep children and pets from drinking directly from barrels.
Step 7: Integrate with Organic Soil Care
Safe rainwater is only one part of a healthy organic system, but it combines beautifully with:
- Mulching – straw, wood chips, or compost mulch to hold moisture, regulate temperature, and reduce weed pressure.
- Drip or soaker hoses under mulch – ultra‑efficient water delivery right at the root zone.
- Swales and contouring – shallow trenches along the contour to slow and infiltrate heavy rains, which some permaculture practitioners pair with tank storage.
By holding more moisture in the soil and delivering water efficiently, you’ll need less total rainwater storage to keep your patch thriving.
Step 8: Check Local Rules and Practicalities
One last, easy‑to‑miss piece: local regulations.
Some regions:
- Encourage rainwater harvesting and even offer rebates.
- Have rules about tank placement, backflow prevention, or using rainwater indoors.
- Restrict or regulate large cisterns.
Best practice is to:
- Check your municipality or water authority’s guidelines before you install a big system.
- In most European contexts, garden‑only systems are welcomed, but it’s still smart to confirm.
Putting It All Together: A Simple Safe Setup for Your Organic Patch
Here’s a typical, safe, organic‑friendly system in a nutshell, based on gardening and water‑harvesting guides:
- Collection roof
- Metal or tile roof on a shed/house, free from toxic coatings.
- Gutters & leaf screens
- Regularly cleaned guttering with guards to keep leaves out.
- First‑flush diverter
- A section of pipe that collects and discards the first dirty runoff.
- Filtered entry
- A simple filter basket at the inlet to your barrel or tank.
- Food‑grade, covered storage
- Opaque, lidded barrel or tank with screened vents and a tap near the base.
- Raised stand & overflow
- Barrel lifted on blocks, with overflow piped to a soakaway or rain garden.
- Soil‑level irrigation
- Drip lines or soaker hoses, or watering cans aimed at the soil, not leaves.
- Regular cleaning & inspection
- Seasonal gutter clean, filter check, and occasional tank scrub.
Run that alongside good organic practices—healthy soil, mulch, diverse planting—and you’ll have a vegetable patch that’s not only greener in colour, but greener in footprint too.
Rainwater harvesting doesn’t need to be complicated or high‑tech; it just needs a bit of thoughtful design to keep things clean and safe. Once it’s in place, you’ll wonder why you ever paid to spray chlorinated tap water over your lovingly raised organic veg in the first place.