











Self-watering pots are a game-changer for busy plant parents. They promise consistent moisture, fewer watering chores, and happier roots. But there is a hidden downside many gardeners overlook: salt buildup. Over time, the very mechanism that makes these pots convenient—wicking water upward from a reservoir—can concentrate minerals and fertilizer salts in the soil, eventually harming your plants.
If you have noticed white crust on your soil surface, brown leaf tips, or stunted growth despite regular watering, your self-watering container may be part of the problem. Understanding why this happens and how to prevent it can save your plants—and your soil—from slow, silent damage.
How Self-Watering Pots Work
Self-watering pots, also called sub-irrigated planters (SIPs), use a reservoir at the bottom to hold water. A wicking system—such as a fabric strip, soil column, or capillary mat—draws water upward into the potting mix as the soil dries. This keeps the root zone evenly moist without daily watering.
Key features include:
- A water reservoir below the soil line.
- A wicking mechanism to move water upward.
- An overflow hole to prevent overfilling.
- A fill tube or opening to add water without disturbing the soil.
Because water moves up from below and evaporates from the top, these systems reduce watering frequency and can be ideal for drought-sensitive plants, travelers, or forgetful waterers.
The Salt Buildup Problem
The same wicking action that keeps soil moist also creates a perfect environment for salt accumulation. Here is how it happens:
- Water contains dissolved minerals. Tap water often contains calcium, magnesium, sodium, and other ions. Fertilizers add more dissolved salts (nitrogen, potassium, phosphorus, micronutrients).
- Water moves upward and evaporates. As water is drawn up from the reservoir and evaporates from the soil surface, the dissolved minerals and fertilizer salts are left behind.
- Salts concentrate over time. With repeated cycles of wicking and evaporation, salts accumulate in the upper layers of the potting mix, forming a visible white crust or remaining invisible but still harmful.
- Roots suffer. High salt levels can draw water out of root tips, damage root cells, and inhibit nutrient uptake, leading to wilting, leaf burn, and reduced growth—even when the soil is moist.
Unlike traditional pots, where excess water drains out the bottom and carries away some salts, self-watering pots do not flush naturally. The salts stay trapped in the system.
Signs Your Soil Has Salt Buildup
Salt accumulation does not always announce itself dramatically. Look for these warning signs:
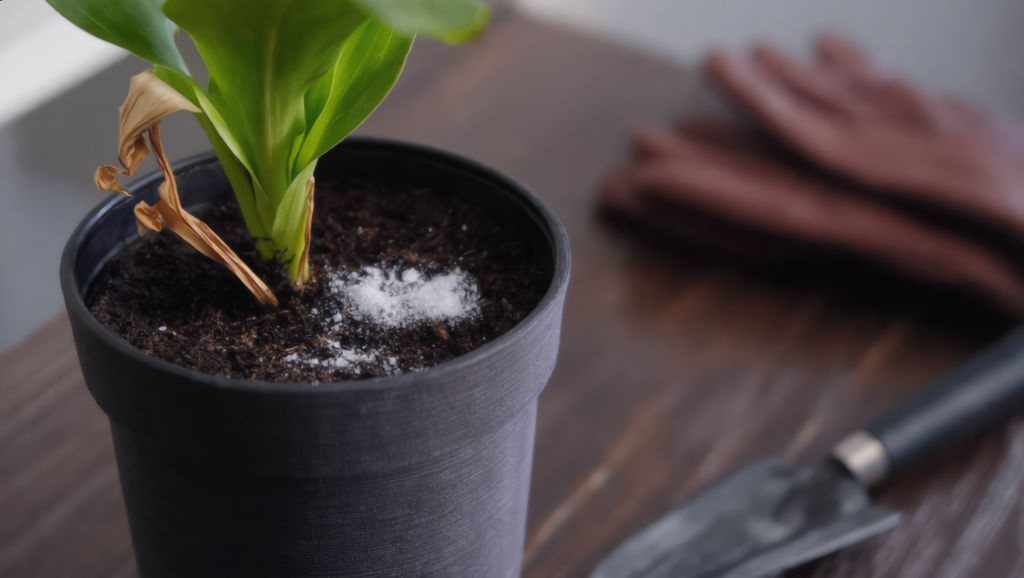
- White crust on soil surface. A powdery or crystalline coating near the top of the pot or around the rim.
- Brown, dry leaf tips and edges. Classic symptom of fertilizer burn or osmotic stress from high salts.
- Stunted growth or reduced vigor. Plants may look generally unhappy despite adequate water.
- Wilting in moist soil. Paradoxically, plants can wilt even when the soil is wet because roots cannot take up water against a high-salt gradient.
- Dead or blackened root tips. Visible upon repotting; roots may appear scorched or mushy.
- Salt ring around pot. A white deposit at the soil line, drainage hole, or on the exterior of clay pots.
If you see several of these symptoms together, especially in a self-watering container, salt buildup is a likely culprit.
Why Self-Watering Pots Are Especially Prone To Salts
Several factors make self-watering containers more vulnerable than traditional pots:
1. No natural leaching
In a standard pot, watering from the top until water drains out the bottom leaches the medium, carrying away excess salts such as hard-water carbonates and unused fertilizer salts. In a self-watering pot, water largely moves up and evaporates from the surface, which can leave salts concentrated near the top.
2. Repeated evaporation cycles
Every time water is drawn up and evaporates, it leaves dissolved minerals behind. Over weeks and months, this concentrates fertilizer salts and naturally occurring minerals in the potting mix.
3. Fertilizer in the reservoir
Adding liquid fertilizer directly to the reservoir can accelerate salt buildup. The solution sits in the reservoir for days or weeks, nutrients are pulled upward slowly, and excess fertilizer is not flushed away.
4. Hard water
If your tap water is hard (high in calcium, magnesium, or sodium), each refill adds more dissolved minerals that can accumulate over time.
5. Limited drainage
Many self-watering pots have minimal or no bottom drainage beyond an overflow hole. This reduces the opportunity for salts to exit the system naturally.
How Salt Buildup Harms Plants
High salt levels in soil affect plants in several ways:
- Osmotic stress. Salts lower the soil water potential, making it harder for roots to absorb water. This can cause wilting even in moist soil.
- Root damage. Salt can burn root tips, reducing the root system’s ability to take up water and nutrients.
- Nutrient imbalance. Excess of certain ions (e.g., sodium, chloride) can interfere with uptake of others (e.g., potassium, calcium), leading to deficiencies despite fertilization.
- Leaf burn. Salts transported to leaves can accumulate at margins and tips, causing browning and necrosis.
- Reduced growth. Chronic salt stress slows cell division and expansion, leading to smaller leaves, shorter stems, and overall reduced vigor.
Over time, this can make plants more susceptible to pests, diseases, and environmental stress.
Preventing Salt Buildup In Self-Watering Pots
You do not have to abandon self-watering containers to avoid salt problems. With a few adjustments, you can minimize accumulation and keep your soil healthy.
1. Use low-salt water
- Choose filtered, rain, or distilled water when possible.
- If using tap water, let it sit overnight so some chlorine dissipates, and consider using a carbon filter to reduce dissolved minerals.
- Avoid water from dehumidifiers unless you are sure it is clean and low in contaminants.
2. Fertilize carefully
- Do not add full-strength liquid fertilizer directly to the reservoir. This can cause salt buildup, root burn, and algae growth.
- Use diluted fertilizer, and apply it occasionally from the top so it can flush through the soil.
- Consider using slow-release granules mixed into the soil rather than constant liquid feeding in the reservoir.
- Refill the reservoir with plain water between fertilizer feedings to dilute any residual salts.
3. Flush the soil periodically
- Every 1–2 months, water generously from the top until water flows out of the overflow area. This helps flush accumulated salts from the upper layers.
- Repeat until the runoff looks clear and free of visible salts.
- For severe buildup, remove the plant, rinse the soil gently, and repot with fresh mix if needed.
4. Replace potting mix annually
- Even with careful management, some salt accumulation is inevitable over multiple seasons. Replacing the potting mix every year resets the system and removes built-up minerals.
- If reusing mix, flush it thoroughly with water at the end of the season and renew it by adding fresh compost or new potting medium.
5. Monitor and adjust
- Check the soil surface regularly for white crust. Scrape off visible deposits before flushing.
- Watch for leaf symptoms such as browning tips or curling, which can signal salt stress.
- If possible, use an EC (electrical conductivity) meter to measure salt levels in the soil solution. A rapid surface buildup is a caution sign, even if you cannot measure exact thresholds.
What To Do If Salts Have Already Built Up In Your Self-Watering Pots
If you suspect significant salt accumulation:
- Remove visible crust. Gently scrape off any white deposits from the soil surface.
- Flush thoroughly. Water deeply from the top until water exits the overflow, repeating several times to leach salts.
- Empty and rinse the reservoir. Remove any fertilizer residue or mineral scale from the water chamber.
- Repot if needed. If the plant is severely affected or the soil is old, replace the potting mix entirely.
- Adjust future care. Switch to lower-salt water, reduce fertilizer strength, and institute regular top-flushing.
Are Self-Watering Pots: Still Worth It?
Despite the salt issue, self-watering containers offer real benefits:
- Consistent moisture for thirsty plants.
- Reduced watering frequency.
- Less risk of underwatering for travelers or busy gardeners.
- Good option for drought-sensitive species like peace lilies and spider plants.
The key is to treat them as a tool, not a set-and-forget solution. With proper water quality, careful fertilization, and periodic flushing, you can enjoy the convenience without sacrificing soil health.
Bottom line
Self-watering pots can be a gardener’s best friend—until hidden salt buildup starts undermining your plants’ health. Because water wicks upward and evaporates from the top, minerals and fertilizer salts concentrate in the soil over time, potentially damaging roots, burning leaves, and stunting growth.
Prevent problems by using low-salt water, fertilizing cautiously, flushing the soil every few weeks, and replacing the potting mix annually. Watch for warning signs like white crust, brown leaf tips, and wilting in moist soil.
With a little extra attention, your self-watering containers can remain a convenient, plant-friendly choice rather than a slow, silent threat to your soil.